-
라즈베리파이 학습 방법Autonomous Lawn Mower/Opencv 2025. 1. 17. 12:47반응형
터미널에서
sudo rm /usr/lib/python3.11/EXTERNALLY-MANAGED
Torch, Torchvision, torchaudio 설치
pip install torch==2.0.1 torchvision==0.15.2 torchaudio==2.0.2
터미널에서 pip install을 이용하여 다음을 설치
opencv-python
ultralytics
cvzone 설치
라즈베리파이 카메라를 이용한 이미지 저장 파이썬 코드
import cv2from picamera2 import Picamera2import time
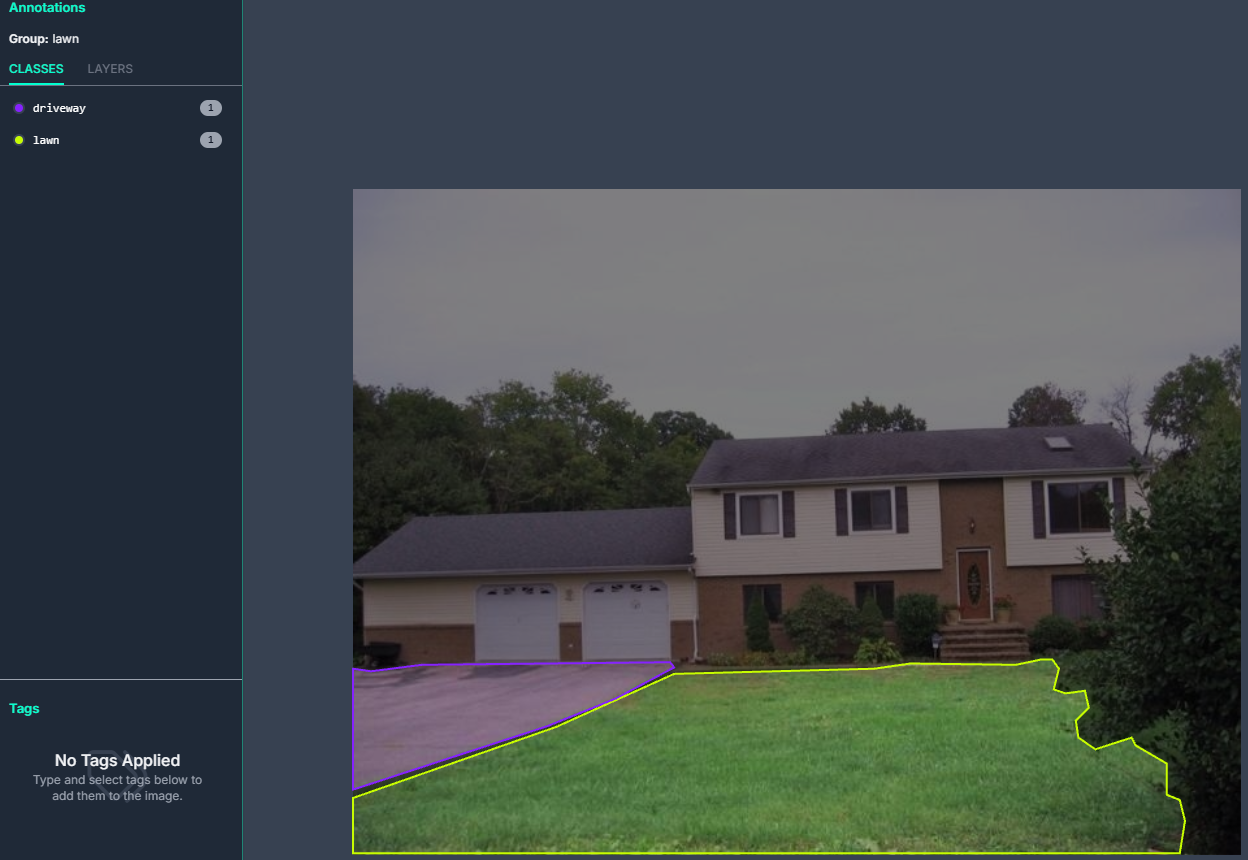
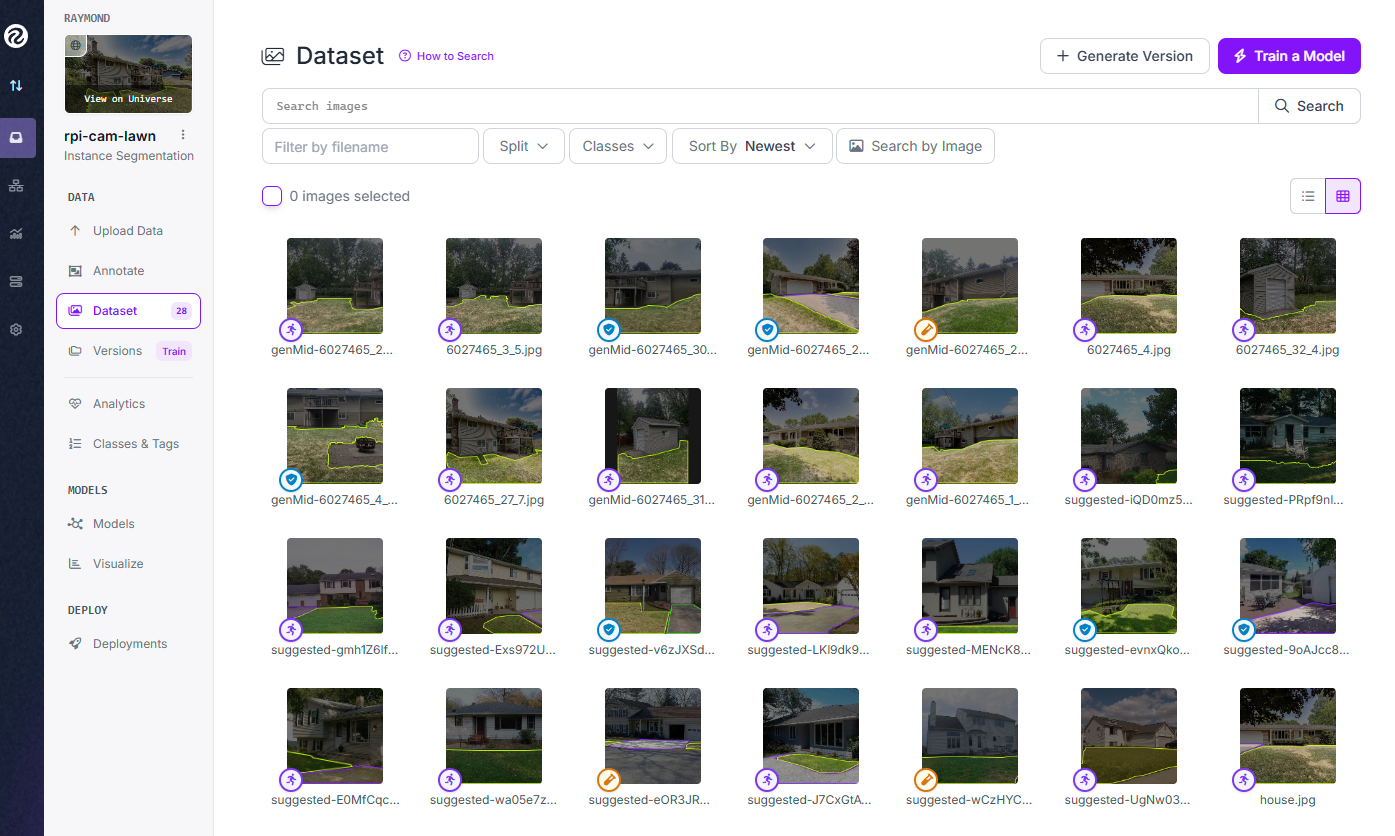
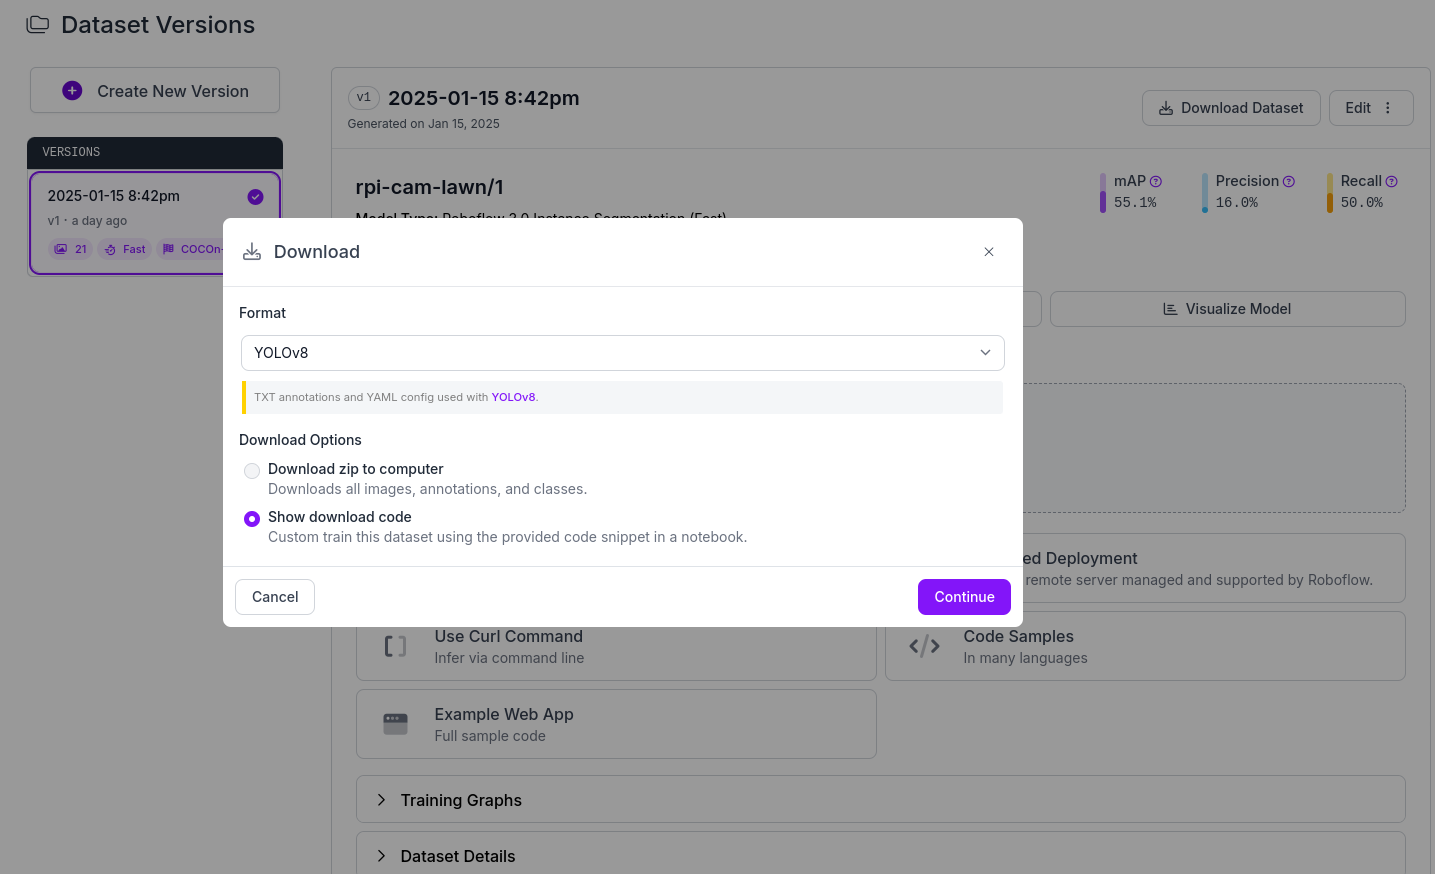
picam2 = Picamera2()picam2.preview_configuration.main.size = (1020,500)picam2.preview_configuration.main.format = "RGB888"picam2.preview_configuration.align()picam2.configure("preview")picam2.start()cpt = 0maxFrames = 30while cpt < maxFrames:im= picam2.capture_array()im=cv2.flip(im,-1)cv2.imshow("Camera", im)cv2.imwrite('/home/pi/rpi-segment-helmet-nohelmet-main/images_%d.jpg' %cpt, im)time.sleep(0.01)cpt += 1if cv2.waitKey(1)==ord('q'):breakcv2.destroyAllWindows()roboflow를 이용해서 저장된 사진의 학습을 진행한다. 잔디 이미지는 redfin에서 확보했다. Lawn과 driveway로 구분해서 학습진행. 20개의 사진을 학습하는데 15분정도 소요되었으며, 학습이 다 완료되면 메일로 메시지를 보내주며, 해당 폴더에 파일명.ipynb 파일이 생성된다.
Train a Model을 클릭한다.
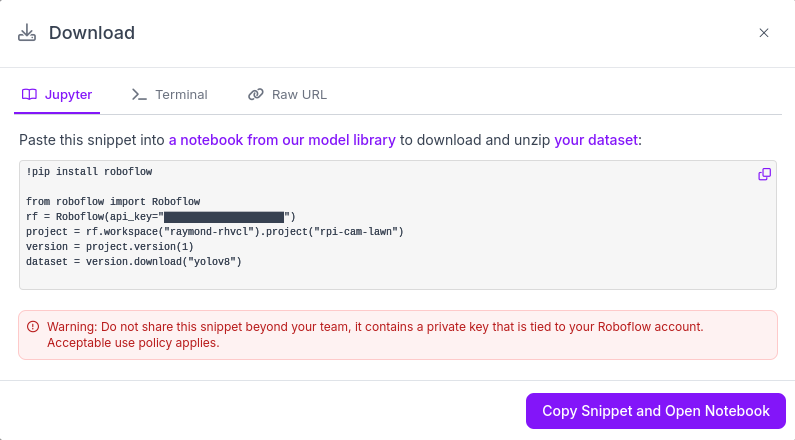
Colab파일에서 파일명.ipynb을 오픈한다. 각 라인을 하나씩 Run한다.
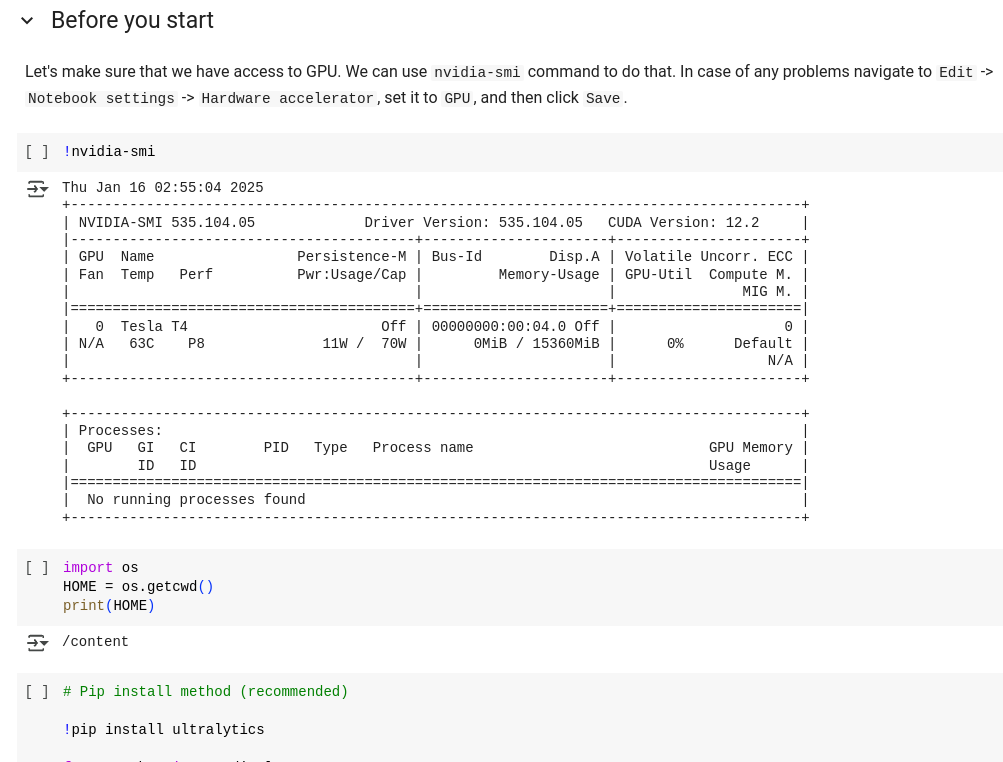
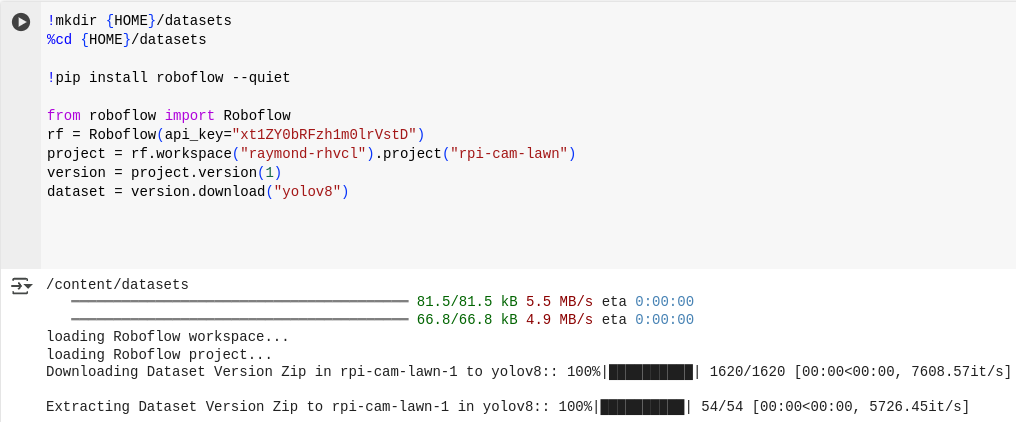
Colab의 아래 실행하기전에 roboflow에서 데이터셋을 다운로드한다. 실행해서 생성된 from roboflow import Roboflow아래 부분을 바꾼다.
import cv2
from picamera2 import Picamera2
import numpy as np
from ultralytics import YOLO
import cvzone
# Initialize the camera
picam2 = Picamera2()
picam2.preview_configuration.main.size = (1020, 500)
picam2.preview_configuration.main.format = "RGB888"
picam2.preview_configuration.align()
picam2.configure("preview")
picam2.start()
# Load YOLO model
model = YOLO("best.pt")
# Get YOLO class names
yolo_classes = list(model.names.values())
classes_ids = [yolo_classes.index(clas) for clas in yolo_classes]
conf = 0.2
count = 0
while True:
frame = picam2.capture_array()
frame = cv2.flip(frame, -1)
count += 1
if count % 3 != 0:
continue
results = model.predict(frame, imgsz=240)
# Create an overlay for transparent polygons
overlay = frame.copy()
for result in results:
if result.masks is not None and result.boxes is not None:
for mask, box in zip(result.masks.xy, result.boxes):
points = np.int32([mask])
class_id = int(box.cls[0])
class_name = yolo_classes[class_id]
# Draw polygons on the overlay
cv2.polylines(overlay, [points], True, (0,0,255), 1)
cv2.fillPoly(overlay, [points], (0,0,255))
# Draw class name text
x, y, w, h = box.xyxy[0].numpy() # Get bounding box coordinates and convert to int
x1=int(x)
y1=int(y)
x2=int(w)
y2=int(h)
cv2.rectangle(frame, (x1, y1), (x2, y2), (255,0,0), 2)
text_position = (int((x1 + x2) / 2), int(y1 - 10)) # Adjust text position to be above the rectangle
cvzone.putTextRect(overlay, f"{class_name}", text_position, 1, 1)
# Apply transparency
alpha = 0.5 # Adjust transparency level here (0.0 to 1.0)
cv2.addWeighted(overlay, alpha, frame, 1 - alpha, 0, frame)
cv2.imshow("FRAME", frame)
if cv2.waitKey(1) == ord('q'):
break
# Release resources
picam2.stop()
cv2.destroyAllWindows()※ 참고자료
반응형'Autonomous Lawn Mower > Opencv' 카테고리의 다른 글
Pre-trained models for segmentation (2) 2025.01.13 비디오 파일 재생 (1) 2024.12.24 카메라 영상 출력 Camera display (1) 2024.12.15 Imwrite (1) 2024.11.26 Imread (0) 2024.11.26